


For a long time now I have attempted to render a photo realistic 3 D scenes in blender. Until recently the formula for achieving this feat had eluded me. I tried in blender internal and failed miserable. Then Blender developers introduced the cycles rendering engine and getting real world results was still a daunting task even with the more accurate cycles engine. I played around in the node editor and tried many effects. The secret just remained well hidden from me. The more I modeled and rendered the more I failed.
I got to be pretty good at texturing objects in the process of finding photo realism. I also learned some cool modeling tricks. In the end my renders still looked fake or they just wasn’t what I was expecting out of blender.
 In the above image I textured the building facade and added ivy with the ivy generator, textured the ivy, set up my lighting, and added a environment texture to the world, yet the image lack realism to me. The color saturation seemed to deep and even cycles seem to miss the bounced lighting. So I figured pretty much it isn’t blender, it has to be me.
Here are a few things I picked up along the way that helped me alot that I would like to share with you. These are not the absolute holy grail of achieving photo realism and they are not in any particular order but they all should be considered.
1. Modeling
You should strive to make and accurate clean model of what your trying to replicate. Use reference images so that you have a good ideal of what your trying to show. Look at lots of pictures and work from there. your imagination is good but sometimes it can lead you astray. Here is an old tutorial but it is a good example and it should work in current blender versions. Always try to use good textures, Normal maps, Bump maps, Specular maps. http://www.the-blueprints.com/tutorials/blender/
2. Composition
What is you audience going to see? What is the subject of your image? What are we looking at? These are questions you should ask yourself when creating a 3d image in blender. What to want my eyes to focus on? The main subject of the image is important, you dont want your viewer to try and look at to many things at once, besides the human brain gets frustrated and will not make sense of any of what the eyes are showing it. Pick an object as the focal point of your image and let everything else in the image point to it. Knowing a little about photography helps. These thing are important in an image
Framing ( your main subject)
Perspective (where am I looking from or what am I looking at)
Space ( create closeness or distance)
Balance ( how much is in frame and what is important )
Color ( what drives a viewer to or distracts them from your subject)
Try the rule of thirds it helps you to follow the above five principles.
http://digital-photography-school.com/rule-of-thirds/
Jonathan Lampel explains his secrets to a more interesting render.
3. Lighting
Is it day or night is it inside or outside? Light your scene and subjects based on the environment you put them in. Try to understand how lighting works in the real world. Look at the differences between hard and sof shadows. Learn how bounced lighting works and it influences othe objects. Learn about 3 point lighting and also learn how to use HDR images in projects. Hdr images can provide the correct environment effects to your images. You can google Hdr lighting in blender and also three point lighting.
This is just a short list of helpful tips to improve your renders. I left out post processing basically because that is a subject unto itself. There are lot of things you can do in blender compositor but the key is learning what each node does. I suggest you look at painting and professional photos to get an ideal of what a good image should look like. Also look at images on some of 3d forums to give yourself something to shoot for.
Thanks for reading. Always learning and always sharing.
Additional reading
http://www.blenderguru.com/articles/achieving-photorealism-in-blender/#.U_jtAHVdUgF
http://digital-photography-school.com/5-more-elements-of-composition-in-photography/

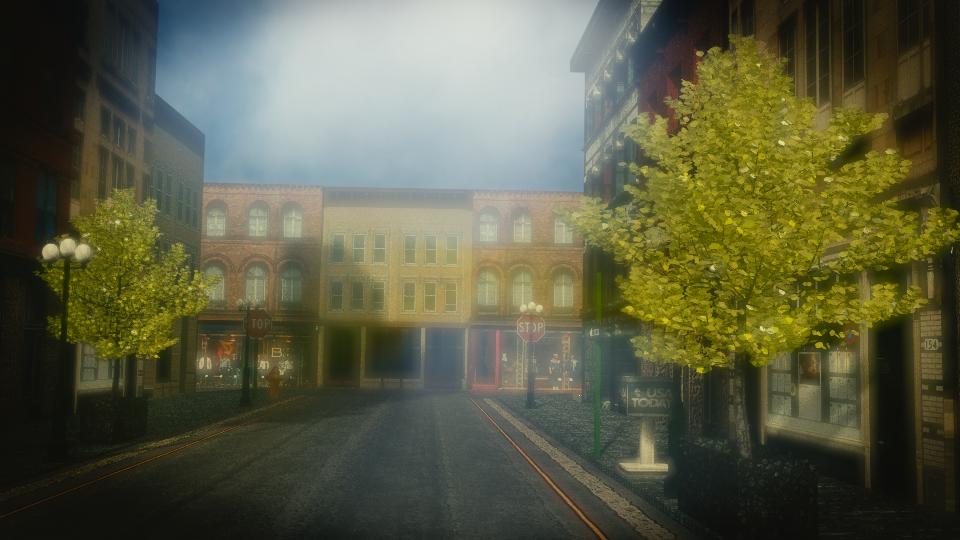


 This render was just an exercise in texturing for me and practice using the ivy gen add on in blender 2.70. I am working towards being able to achieve photo realism in a render.


